Do you want to monetize your WordPress site by offering premium content to subscribers?
Monetizing your WordPress website can be achieved through a paywall that restricts access to selected premium content, prompting users to pay for access, thereby generating income for your business.
This article will review the process of creating paywalls using the ProfilePress WordPress Membership Plugin and another method using the MailOptin content-locking feature.
Table of Contents
What is a Paywall?
A paywall is a tool website owners or publishers use to restrict access to specific content. Users must make a payment before they can view or access that content. This mechanism monetizes online content and generates revenue for website owners or publishers.
With a paywall, website administrators can designate specific pages, articles, or sections of their site as premium or exclusive, setting them behind a virtual barrier. Visitors who wish to access this premium content are prompted to make a payment, typically through various payment gateways.
Depending on the website owner’s monetization strategy, this can be a one-time payment, a subscription fee, or other payment models.
Content creators, news websites, and online publishers commonly use paywalls to generate revenue from their valuable or specialized content.
Types of Paywalls
Paywalls can be implemented in various ways to restrict access to content and monetize your website. Here are several paywalls commonly used in WordPress websites:
Hard Paywall: Requires users to pay before accessing any content. It is often used for premium or exclusive content.
Metered Paywall: Users can access a limited number of articles or content pieces for free within a specific period. Once they reach the limit, they are asked to pay for continued access.
Soft Paywall: Offers a combination of free and premium content. Users can access basic content for free but need to pay for advanced or exclusive material access.
When choosing a paywall strategy for your WordPress site, consider your content, audience, and business goals to determine which type aligns best with your overall strategy and user experience.
Pros & Cons of Using Paywalls
Implementing paywalls in WordPress can be a strategic decision for many website owners, but it has advantages and disadvantages. Here’s an overview of the pros and cons:
Pros of Paywalls
Steady Income: There are various ways to earn money from a WordPress site. You can put up ads and links to earn money, write posts sponsored by others, or make your content available behind a paywall. Many website owners like using paywalls because they ensure a consistent income. Visitors who subscribe to your site pay a monthly or yearly fee to access your content regularly.
Building a Community: For many online businesses, building a community is an intelligent way to ensure long-term success. Adding a paywall to your website creates an illusion of exclusive access to your content. You can further promote your Facebook, Slack, and Discord groups to people who subscribe to your service.
Content Control: Implementing a paywall on your WordPress site gives you control over who accesses your premium content, allowing you to target a specific audience.
Cons of Paywalls
Low Traffic and High Bounce Rates: After implementing a paywall on your WordPress site, you may notice a decrease in traffic as some visitors leave the site when they encounter the paywall. However, there are ways to tackle this challenge.
One effective way is having a content strategy that focuses on publishing high-quality and free content.
By providing valuable information to your audience without any paywall restrictions, you can attract and maintain a larger audience, and this subsequently reduces the bounce rates.
Furthermore, you can use your free content to promote your premium content behind the payment wall, drawing more subscribers to your WordPress site.
Unmet Expectations: Subscribers have high expectations for your premium content. Failure to meet these expectations could lead to adverse consequences, including negative reviews on public forums and abusive emails from existing customers. This backlash poses a substantial threat to the sustainability of your online business.
It is important to focus on providing high-quality content that matches the promises made during the subscription process to avoid issues.
If you consistently exceed user expectations, they will be more satisfied and less likely to give negative feedback.
It is also important to establish clear communication channels to address user concerns in a timely manner. This ensures a positive user experience and protects your online business’s reputation.
SEO Impact: While effective for monetization, implementing paywalls can pose challenges to search engine optimization (SEO) and hinder content discoverability. Restricting access to content may limit the visibility of your website on search engines, impacting organic search traffic.
To lessen the SEO impact of paywalls, consider the following strategies:
- Strategic Content Indexing: Ensure that essential content remains accessible to search engine crawlers.
- Balanced Access Control: Implement a balanced approach to access control. While some premium content may be behind the paywall, maintain a substantial amount of high-quality, indexable content accessible to visitors and search engines.
- SEO-Friendly Meta Data: Optimize meta titles, descriptions, and other on-page elements to make the content visible to search engines. This ensures that even if certain content is behind a paywall, its metadata contributes positively to SEO.
- Leverage Free Preview Content: Offer free preview content that provides a glimpse of what’s behind the paywall.
- XML Sitemaps: Regularly update and submit XML sitemaps to search engines. This will inform search engine crawlers about your website’s structure, enhancing the chances of indexing relevant content.
Best Practices for Implementing a WordPress Paywall
Implementing a WordPress paywall involves careful planning and execution to ensure a positive user experience while effectively monetizing your content. Here are some best practices to consider:
Understand Your Audience: Before implementing a paywall, understand your audience’s preferences and willingness to pay. Analyze user behavior, demographics, and engagement patterns to tailor your paywall strategy.
Offer High-Value Content: Ensure that the content behind the paywall provides significant value. High-quality, exclusive, or specialized content encourages users to subscribe or make a one-time payment.
Choose the Right Paywall Model: Select a paywall model that aligns with your content and audience. Options include hard paywalls, metered paywalls, freemium models, and more. The choice depends on your goals and the type of content you offer.
Balance Free and Premium Content: Maintain a balance between free and premium content to provide value to paying and non-paying users. This helps attract new visitors while enticing others to upgrade for exclusive content.
Mobile Responsiveness: Optimize your paywall for mobile devices, as many users may access your content through smartphones and tablets. Responsive designs ensure a consistent experience across all devices.
SEO Considerations: Be mindful of SEO implications. Implement a strategy allowing search engines to index and rank your content appropriately while encouraging users to subscribe for premium access.
By carefully implementing these best practices, you can create a well-balanced paywall strategy that effectively monetizes your WordPress site while maintaining a positive user experience.
How to Create a Paywall in WordPress
To add a paywall to your WordPress site, install and activate the ProfilePress plugin. This plugin simplifies the process of creating paywalls.
Step 1: Install & Activate ProfilePress
To begin, you’ll need to grab a copy of the ProfilePress plugin from their website.
Once you have downloaded the plugin to your computer, log in to your WordPress dashboard.
From there, navigate to the Plugins page, click on the “Add New” button, and then hit the “Upload Plugin” submit button.
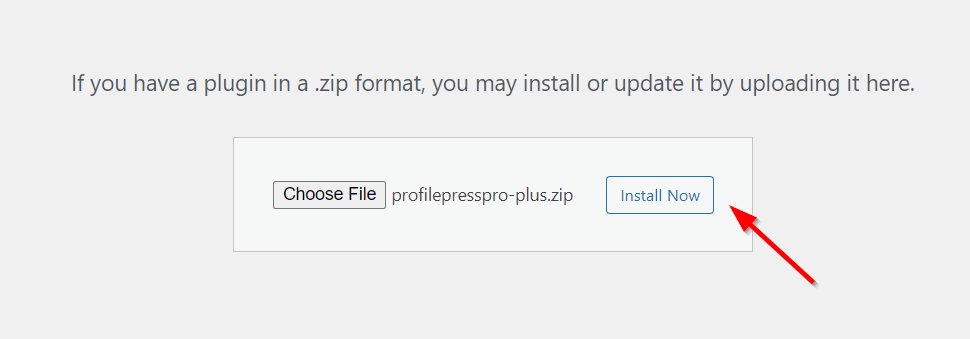
Click on “Choose file” and select the ProfilePress plugin zip file you downloaded earlier. After that, click on “Install Now” to complete the process.
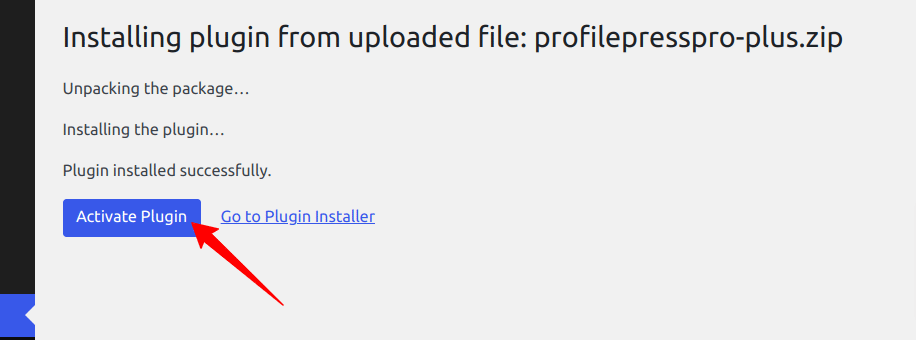
After installing the plugin, click on the “Activate Plugin” button.
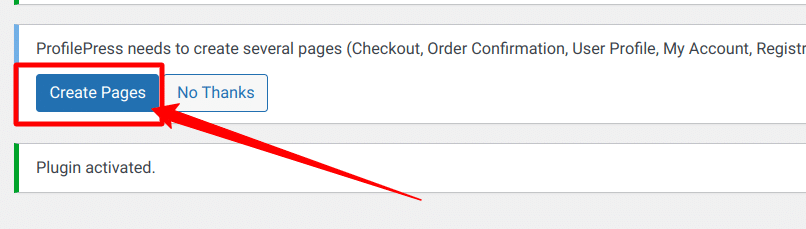
At the top of the page, you will see a notification stating, “ProfilePress needs to create several pages,” click the “Create Pages” button to finalize the plugin’s setup.
Having accomplished this task, the initial setup of the ProfilePress plugin on our WordPress site is now finished.
Step 2: Setup Paid Memberships
Go to ProfilePress >> Membership Plans to create a new membership plan or open up the edit screen of an existing one.
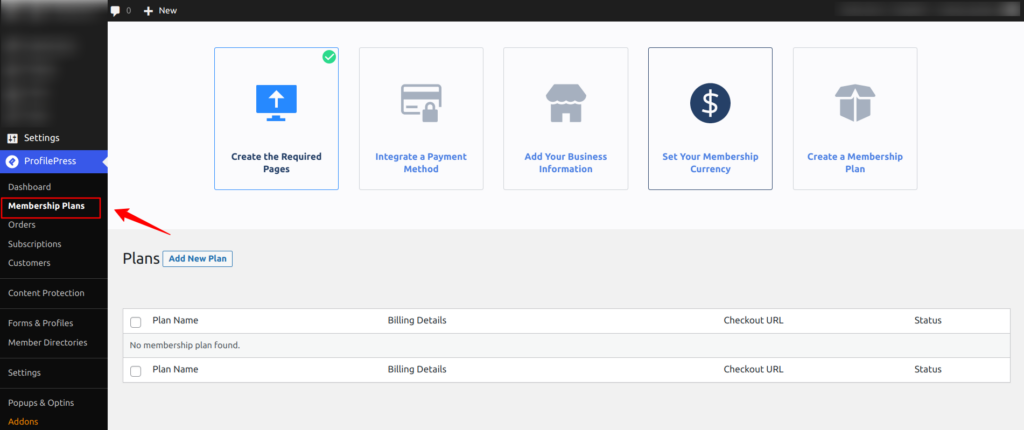
Click on the ‘Add New Plan’ button and you will be directed to the page to create a plan and configure the details for your product. After entering the necessary information, specify the price, subscription length, and billing frequency you wish to associate with this plan.
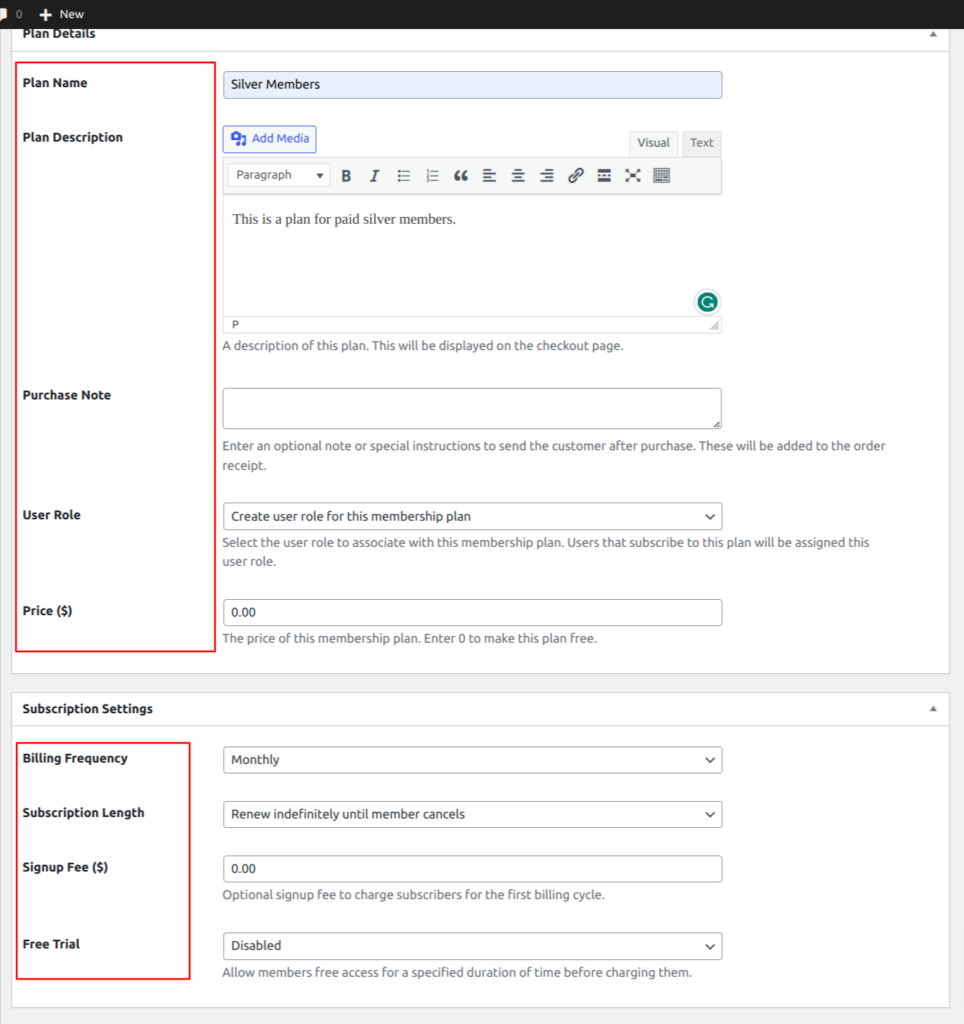
When you are done editing the membership plan, save your changes.
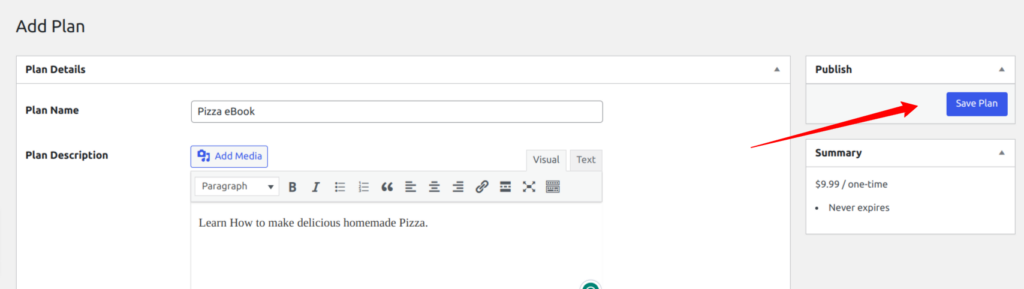
Every membership plan comes with a checkout link that can be added to your website’s pricing page or shared with your users via email, simplifying the process for them to make payments or purchase products.
Navigate to ProfilePress > Membership Plans, and you will find a checkout page link associated with the membership plan you created above.
Connect Payment Gateway
Following that, proceed to configure a payment gateway. Navigate to ProfilePress > Settings > Payments > Payment Methods.
You can connect various payment services there, including Stripe, PayPal, Razorpay, Paystack, and Mollie.
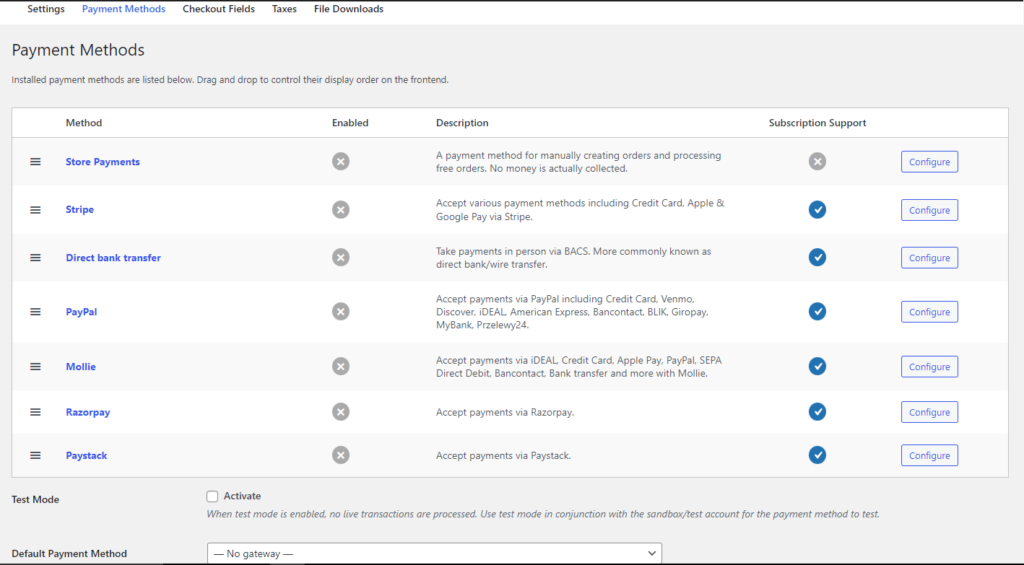
After setting up your chosen payment methods, activate them by checking the Check to Enable checkbox.

Setting Up Hard, Soft & Metered Paywalls
With the ProfilePress plugin, you can create hard, soft, and metered paywalls. In this section, I will guide you through the process.
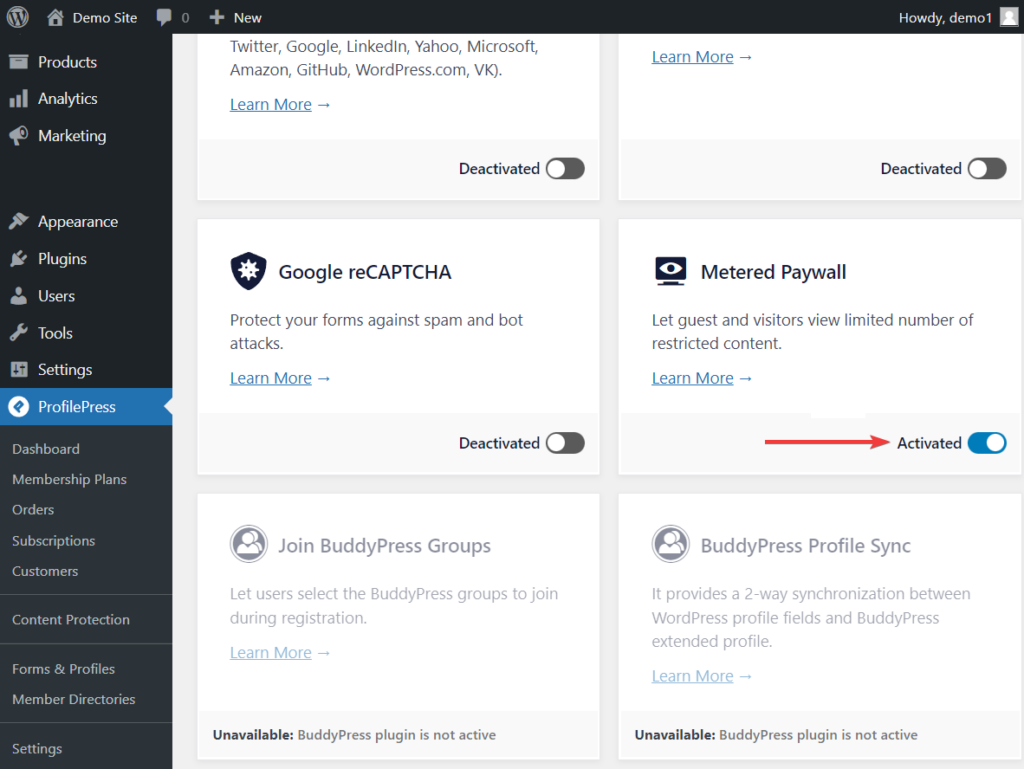
Begin by enabling the metered paywall addon by going to ProfilePress > Addons and switching on the Activate button in the Metered Paywall section.
How to Set Up a Hard Paywall
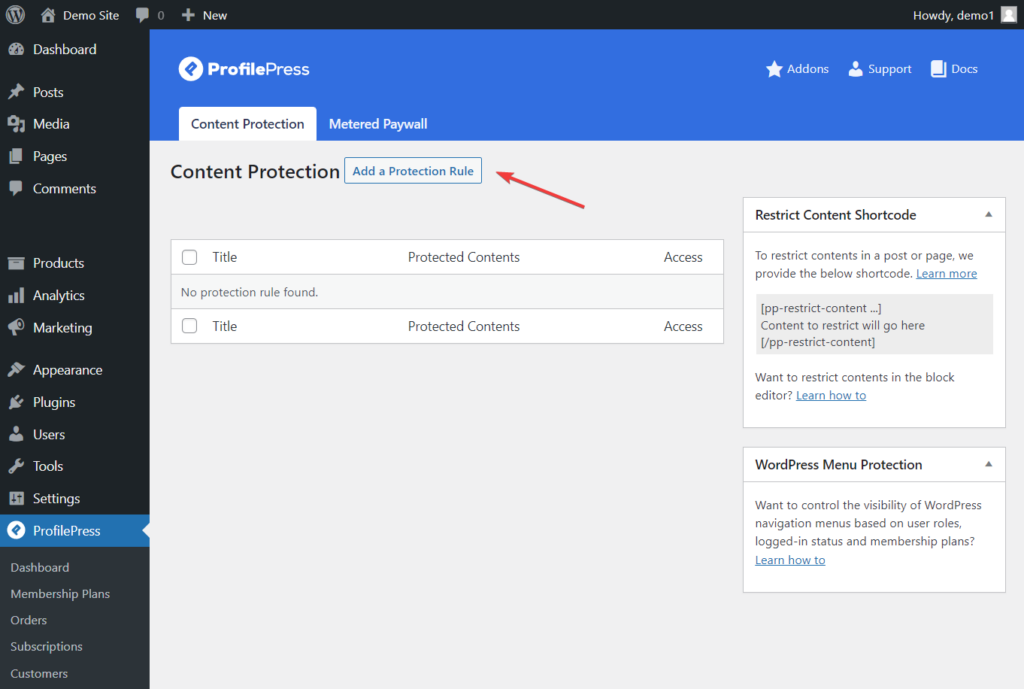
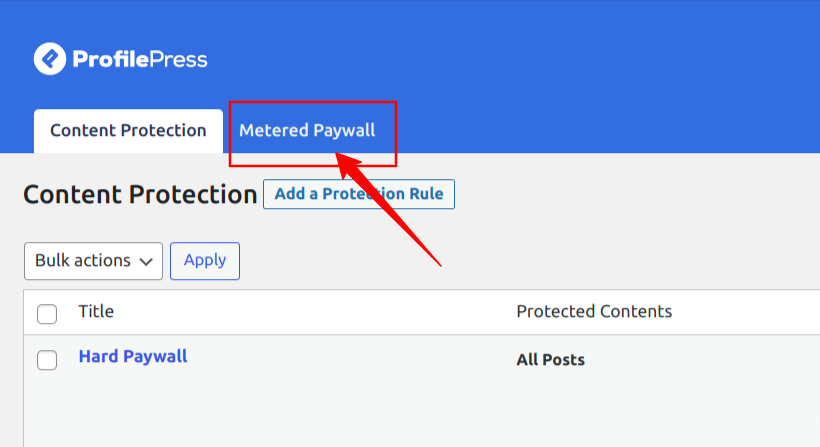
To set up a hard paywall, navigate to ProfilePress -> Content Protection and click on the ‘Add a New Protection Rule’ button.
Proceed to the following page, where you can input a title. Then, choose “All Posts” from the dropdown menu under the “Content to Protect” section.
Note that in addition to ‘all posts,’ you can protect selected custom post types, posts belonging to specific categories and taxonomies, and much more.

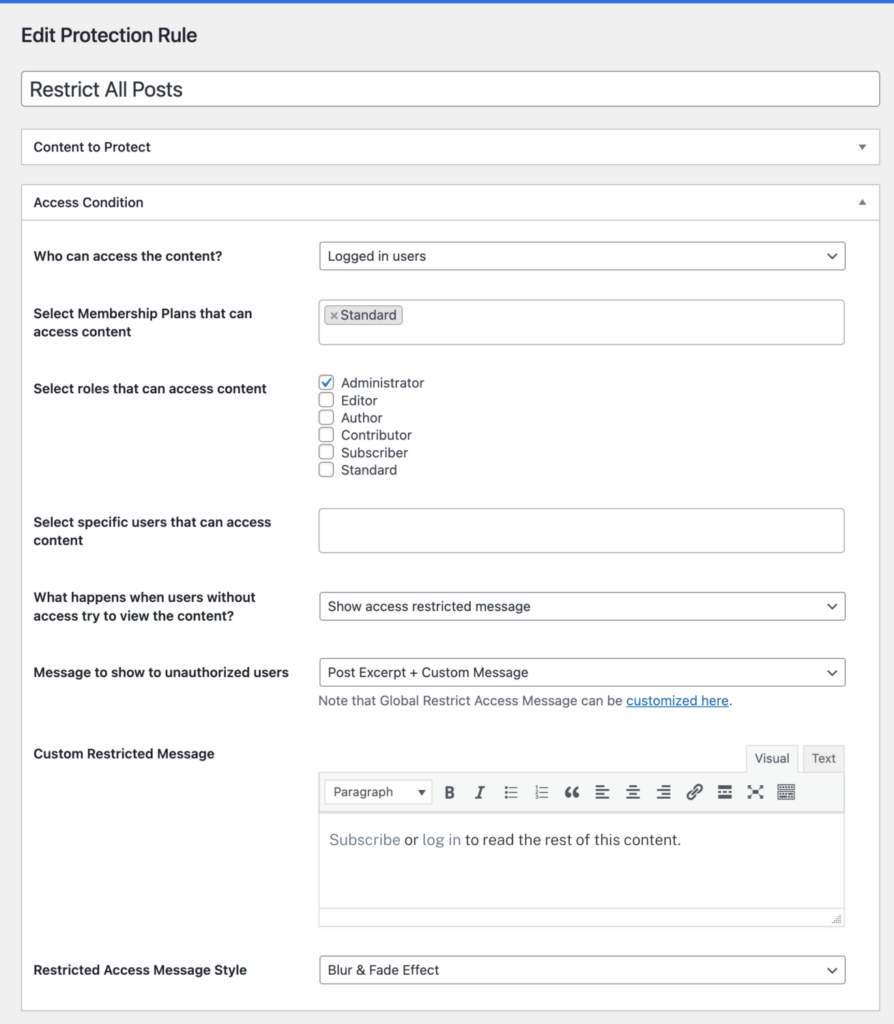
Navigate to the Access Condition section, and choose “Logged in user” from the dropdown menu next to the “Who Can Access the Content” option.
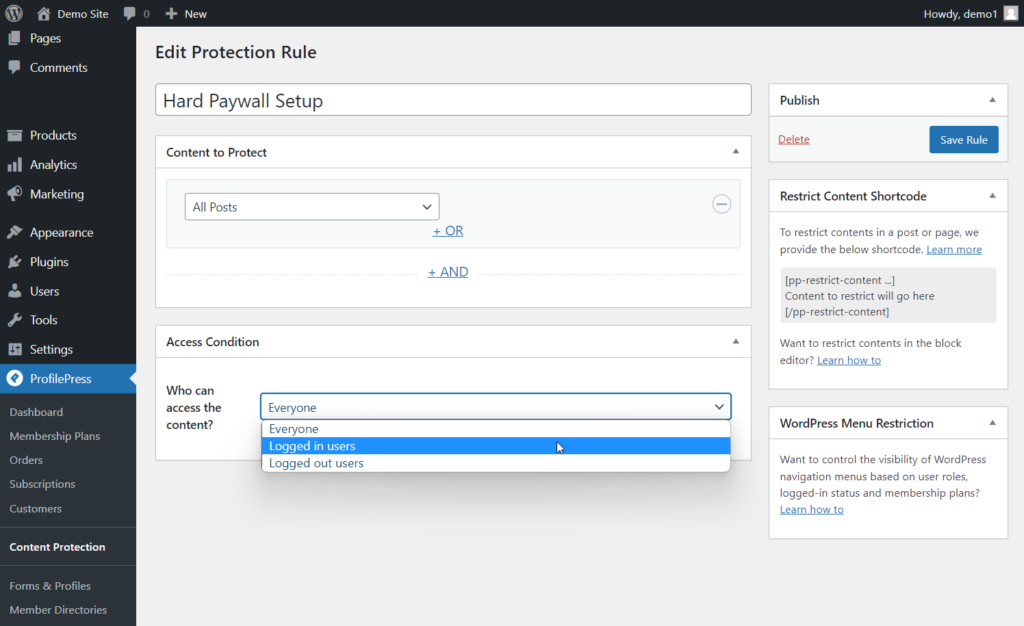
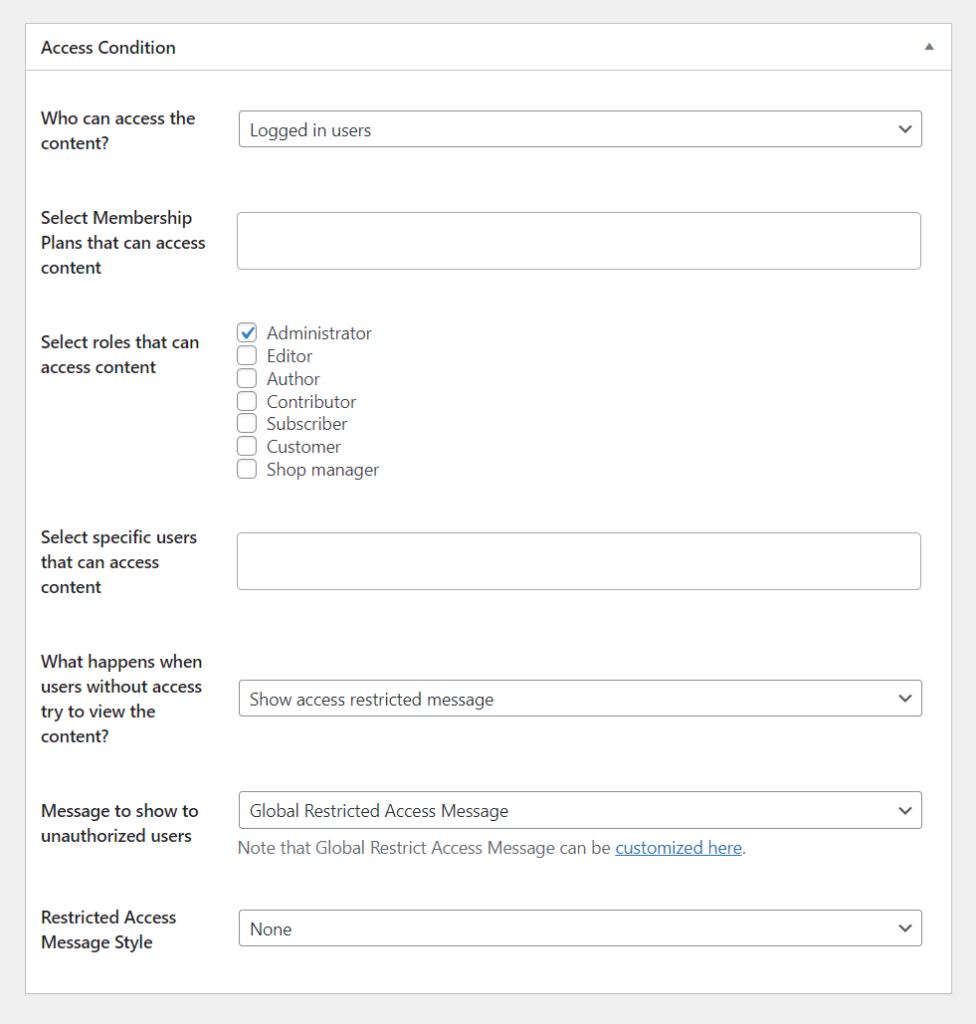
Once you choose the “Logged in users” option, you’ll notice a range of additional choices within the Access Condition section.
Begin by going to the ‘Select Membership Plans That Can Access Content’ field and add the membership plan you made in the previous step.
You can also opt to include other roles that have access to the content, apart from paid members with an active subscription. This may involve selecting roles like Administrator and Editor.
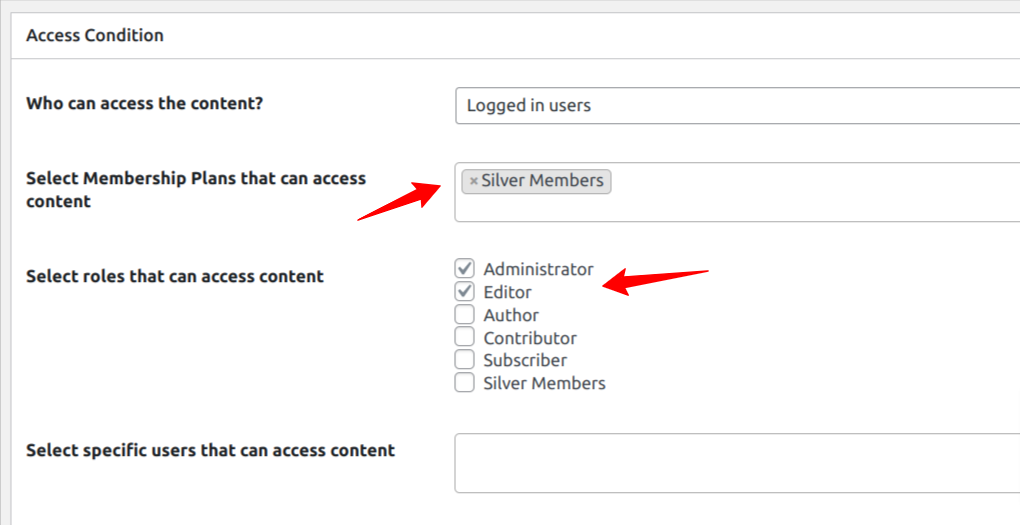
Tip: Regardless of the user role you select, ensure that you include Administrators. This step is important as you would want administrators to have access to your site’s content.
Next, navigate to the Restricted Access Message Style Option and choose the Blur & Fade Effect from the dropdown menu. Then, under the Message to Show to Unauthorized Users, ensure you select the Post Excerpt + Global Restricted Access Message.
Click the Save Rule button to save your settings.
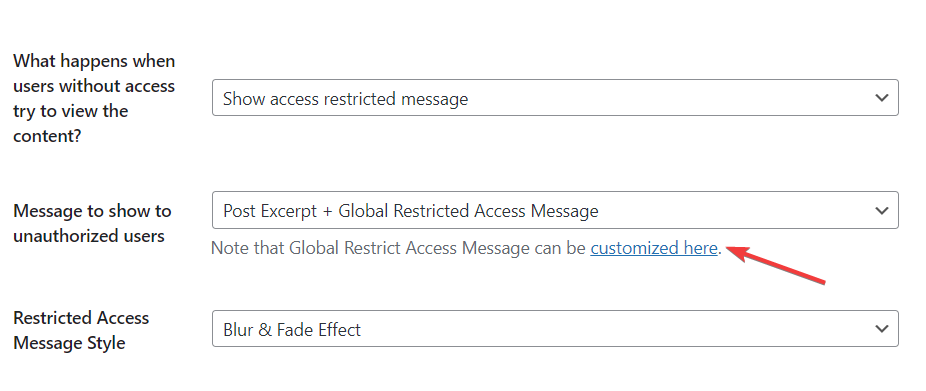
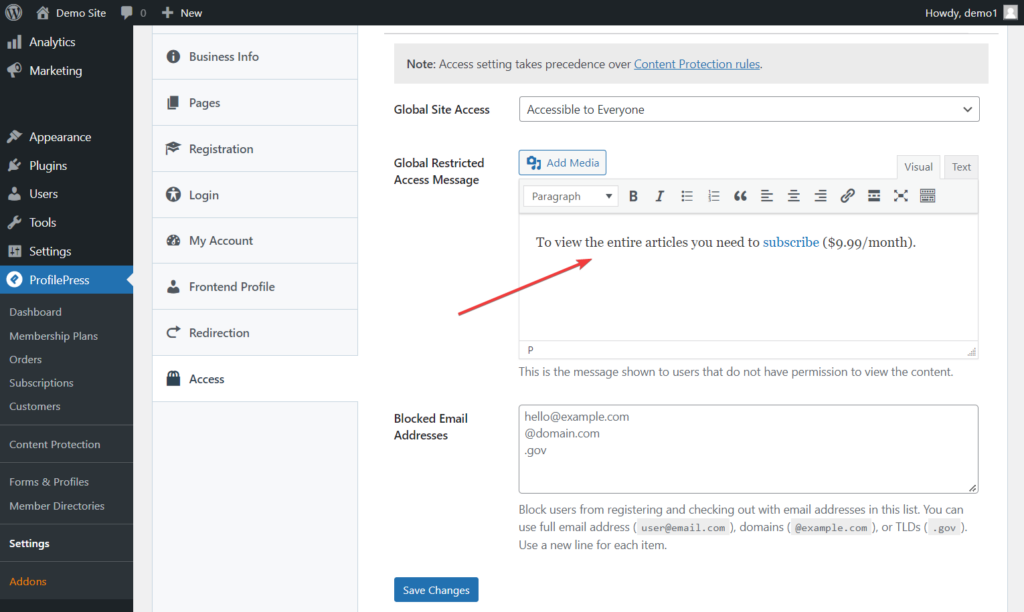
Select the link labeled ‘customized here’ as shown in the image above to add a personalized message for your paywall. This message should tell visitors that subscribing as paying members is required to unlock access to the complete content.
Ensure to include the URL of the plan checkout or pricing page you copied in the ‘Set-Up Membership Plan’ section within this custom message. Visitors will use this link to make payments and subscribe to your website.
Alternatively, you can choose ‘Post Excerpt + Custom Message’ as the message displayed to unauthorized users if you prefer not to use the globally set restricted message.
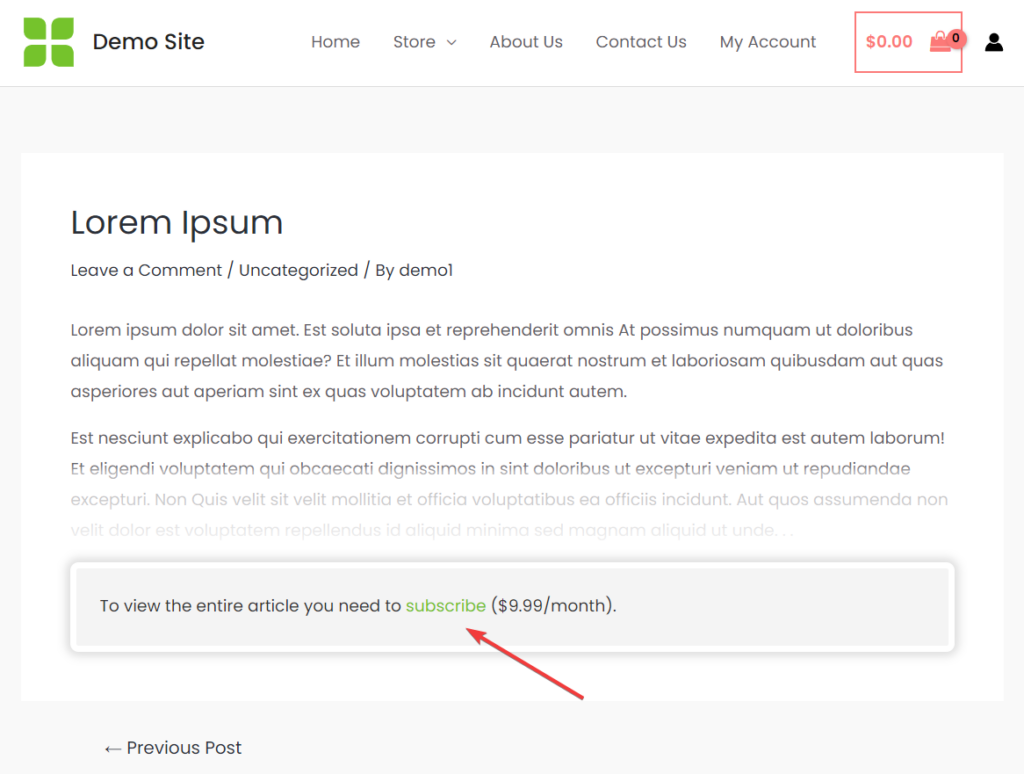
Congratulations! You’ve successfully established a hard paywall on your WordPress website.
Visitors can now only read post excerpts or a limited number of paragraphs when accessing your published posts.
To unlock full access to the entire content of each post, users are required to subscribe to a membership plan. This is the Hard Paywall in action.
How to Setup a Soft Paywall
To set up a soft paywall on your WordPress website using the ProfilePress plugin, you must separate free and premium content. Then tag the premium content as either ‘paid’ or ‘premium.’ Instead of tags, you can also use categories.
The tagging process takes place in the WordPress content editor. Open the page or post, go to ‘Tags,’ enter ‘paid’ or ‘premium,’ and hit enter. You will have to tag all your premium posts and pages this way.
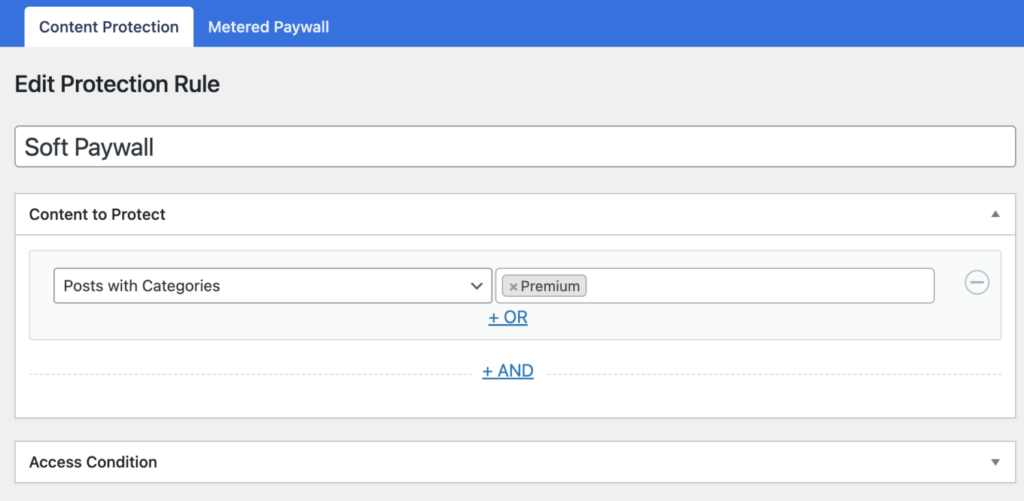
Next, go to ProfilePress > Content Protection and click the ‘Add a New Protection Rule’ button.
On the following page, provide a title. From the select dropdown under ‘Content to Protect’ choose the ‘Posts with Tags’ or ‘Posts with Categories’ if you used categories to define your premium content.
Once you make this selection, a search box will appear on the right. In the search box, locate the tag you recently created. Select the tag and click the ‘Save Rule’ button.
Next, head to the Access Condition section to set up or configure the criteria for accessing premium content. This may include members with an active subscription to specific membership plans.
We won’t repeat the same information here as we have already covered this process in the previous section (hard paywall setup).
By finalizing this setup, all posts tagged as premium will exclusively be accessible to paid subscribers or selected user roles, while the rest of the posts remain accessible for free.
How to Setup a Metered Paywall
To set up the metered paywall on your WordPress website using the ProfilePress plugin, we will go through four steps:
- Restricting content
- Setting up a metered paywall
- Preventing abuse of the paywall
- Adding a countdown slider
Let’s dive into each step.
Restrict Content
First, apply restrictions to your WordPress site content by following the guidelines outlined in the Hard Paywall setup section.
After completing this step, click the ‘Save Rule’ button. Proceed to the second step by opening the Metered Paywall settings beside the Content Protection menu at the top.
Setting Up a Metered Paywall
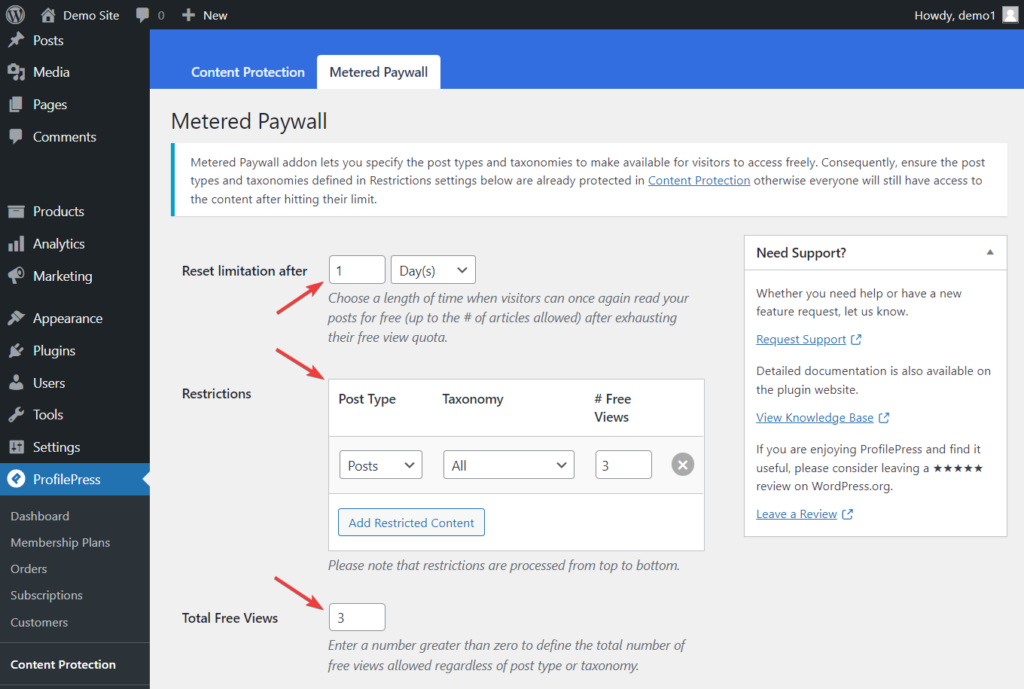
It’s essential to adjust the initial three settings on the Metered Paywall page. Let’s delve into each option.
Reset limitation after enables you to specify a duration during which visitors can access your posts again without any restrictions.
Restrictions allow you to select the post types you want to restrict and how many posts, pages, or custom post types to offer for free.
Total free views allow you to set the maximum number of posts a visitor can view for free. This global setting will take precedence over the previous free views setting.
After making these adjustments, remember to click the ‘Save Changes’ button to ensure the modifications are saved.
Preventing Abuse of Paywall
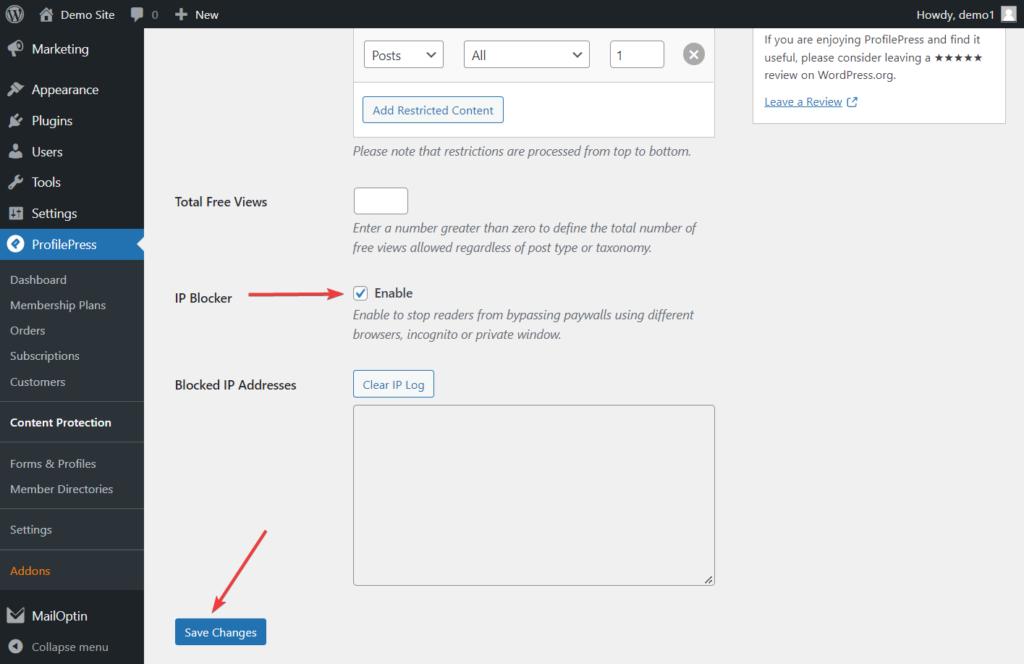
After setting up the metered paywall, it’s important to protect your premium content from unauthorized access through an incognito browser.
Activate the IP Blocker feature to prevent such abuse. First, navigate to Metered Paywall > IP Blocker and select the ‘Enable’ option. Then, click the ‘Save Changes’ button before exiting the page.
How to Add a Countdown Slider
Integrating a countdown slider into your WordPress website, similar to the approach employed by well-established platforms like The New York Times and Medium, provides a strategic method to entice visitors to subscribe. These platforms allow users to access a limited number of premium articles for free, displaying a countdown slider to inform them of the remaining views before a subscription is required.
To implement this, Open the Metered Paywall option on your WordPress dashboard and navigate to the Countdown Slidebox section.
Select the ‘Enable’ option and insert a link to your checkout or pricing page in the ‘Button-Link’ option. Visitors will use this link to access the page to sign up and make payments.
You can also change the message, button text, and log in text if you want to.
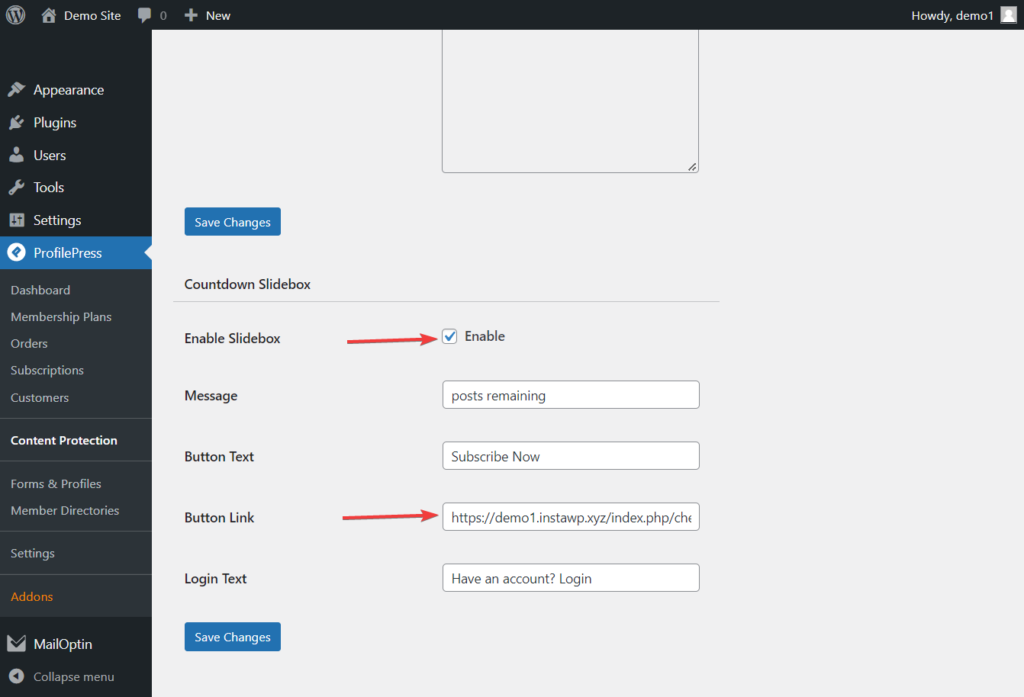
Once you are ready, click the Save Changes button, and the countdown slider will automatically be added to your WordPress site.
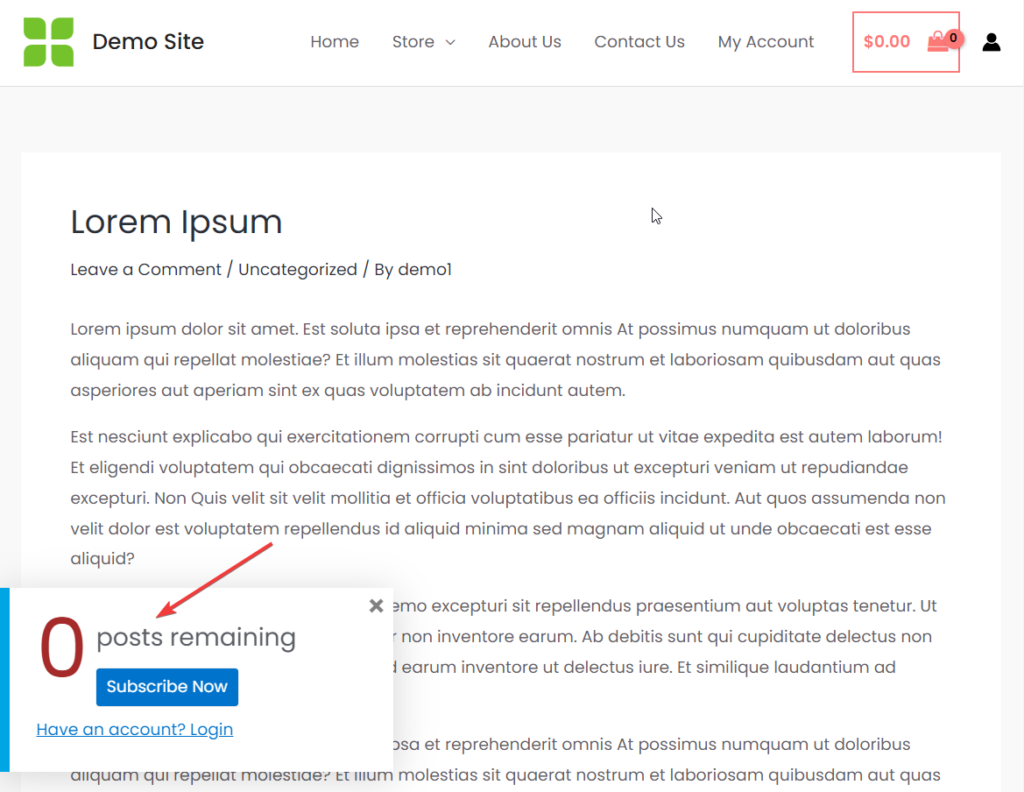
By implementing a countdown slider through the Metered Paywall option, you not only emulate successful paywall models but also create a visually appealing and informative element that encourages visitors to take a step towards subscribing.
Voila! With that, you’ve completed the setup of a metered paywall on your WordPress website.
Bonus: How to Lock Content in WordPress
Another effective method of adding a paywall is implementing content locking.
MailOptin is a lead-generation plugin that can lock specific parts of your site content, prompting visitors to subscribe to your email list before accessing restricted content.
I will guide you through installing and setting up the MailOptin Plugin, creating an opt-in form, and implementing a WordPress content locker to secure our content, requiring visitors to opt-in to our mailing list before accessing the entire article.
Before we begin, ensure the MailOptin content-locking plugin is installed and activated on your site.
Create an Email Optin Form
The next step is to create an opt-in form. To do this, go to your WordPress dashboard and click on the ‘Optin Campaigns’ menu in MailOptin.
Click on the ‘Add New’ button and enter a title or name for the opt-in form. For this example, I will name the opt-in form ‘Lead Magnet’ and select the opt-in type.
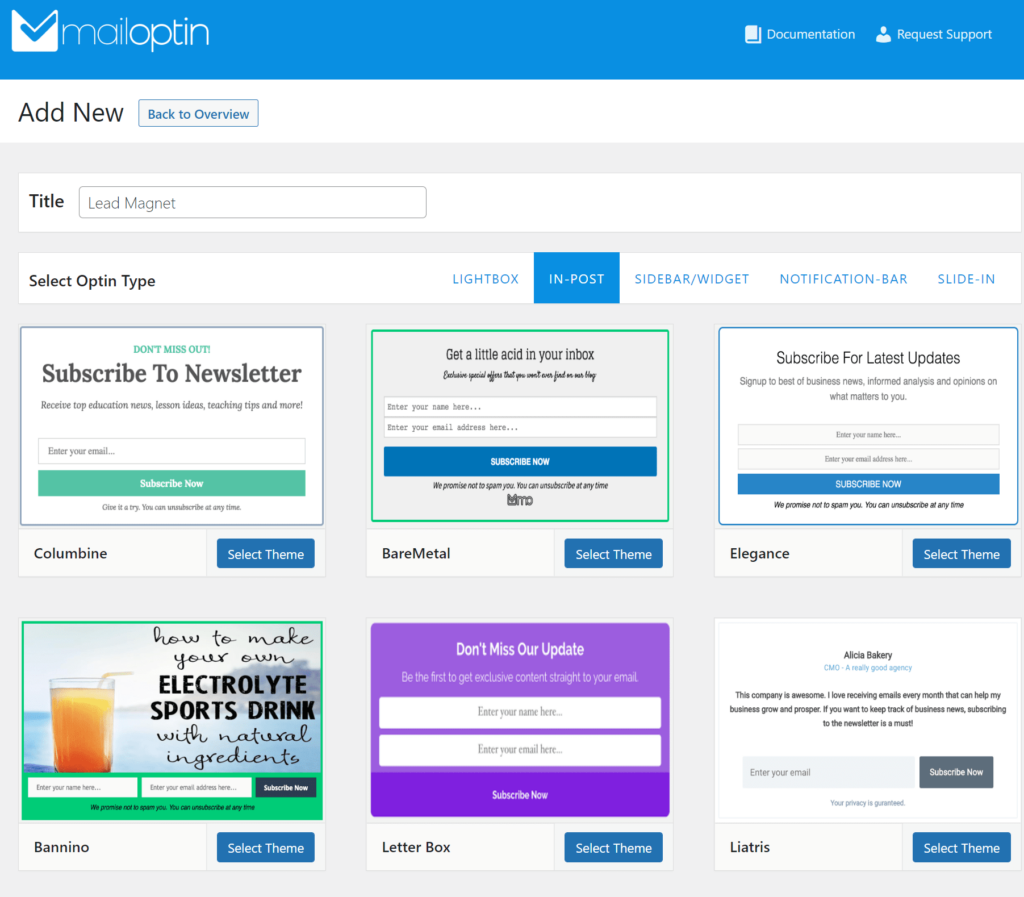
MailOptin offers various campaign types, such as popups, slide-ins, and notification bars. To create a content lock campaign, choose the ‘IN-POST’ opt-in type.
Next, choose the template by clicking the “Select Theme” button. You’ll be instantly directed to the customization page.
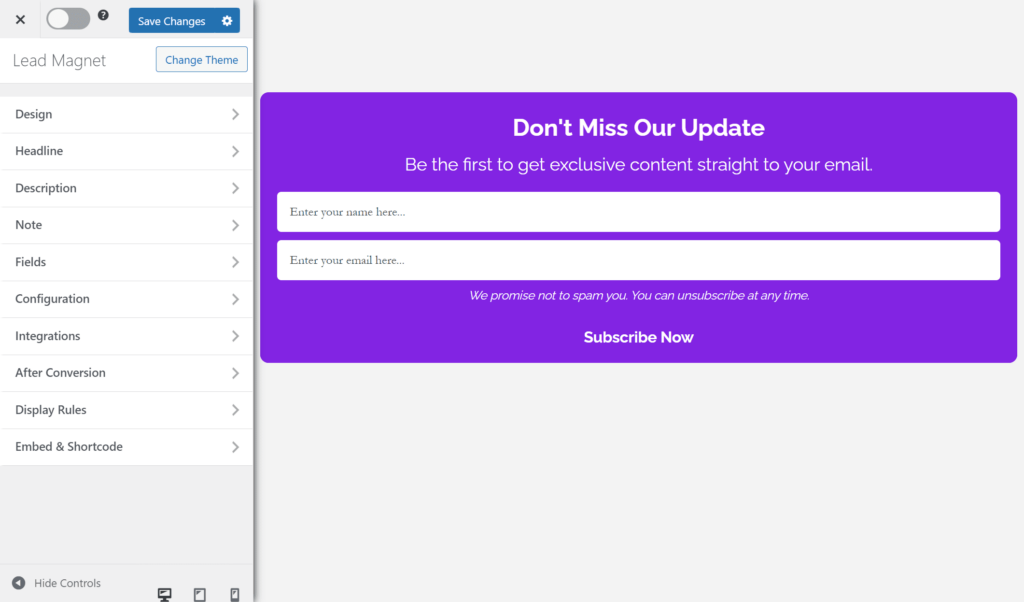
Go to the Design tab to customize the background color of your opt-in form. Additionally, you can customize the typography by using the Headline and Description menus and adjusting text colors.
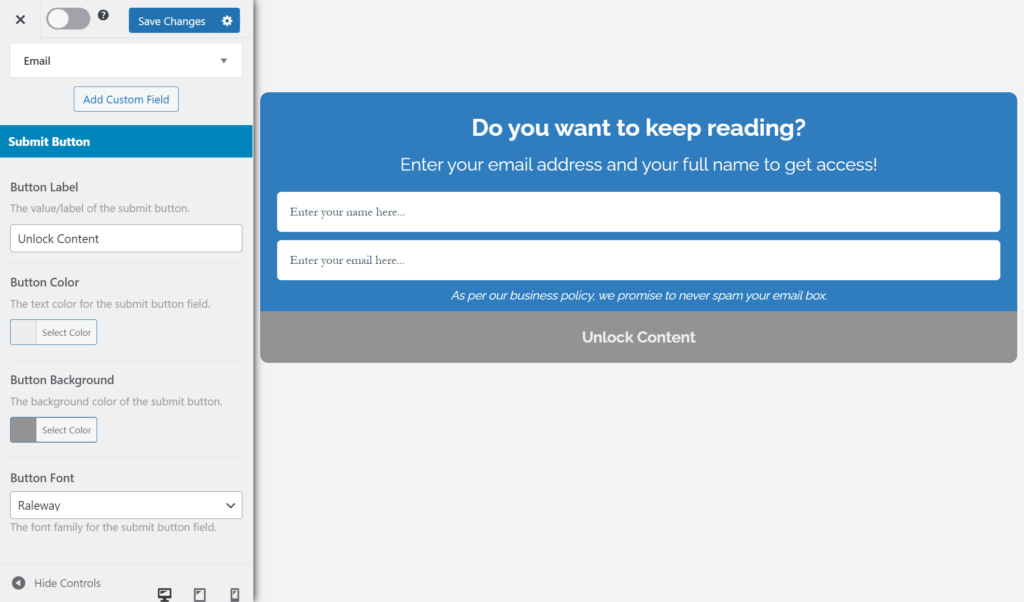
It’s important to use relevant text for the submit button. For example, we use the text “Unlock Content” because that is what happens after your visitors subscribe to your list.
Navigate to the Fields section, scroll down to the Submit Button section, and input your desired custom text into the Button Label text field. Additionally, adjust the button color to enhance its visual appeal further.
Connect Optin Form to Your Email Marketing Software
After carefully designing your opt-in form to how you like it, the next important thing is connecting it with your email service. To do this, click on the ‘Integrations’ button.
In the menu that appears, choose your email service from the options in the ‘Select Integration’ dropdown. As an example, we’re using Mailchimp.
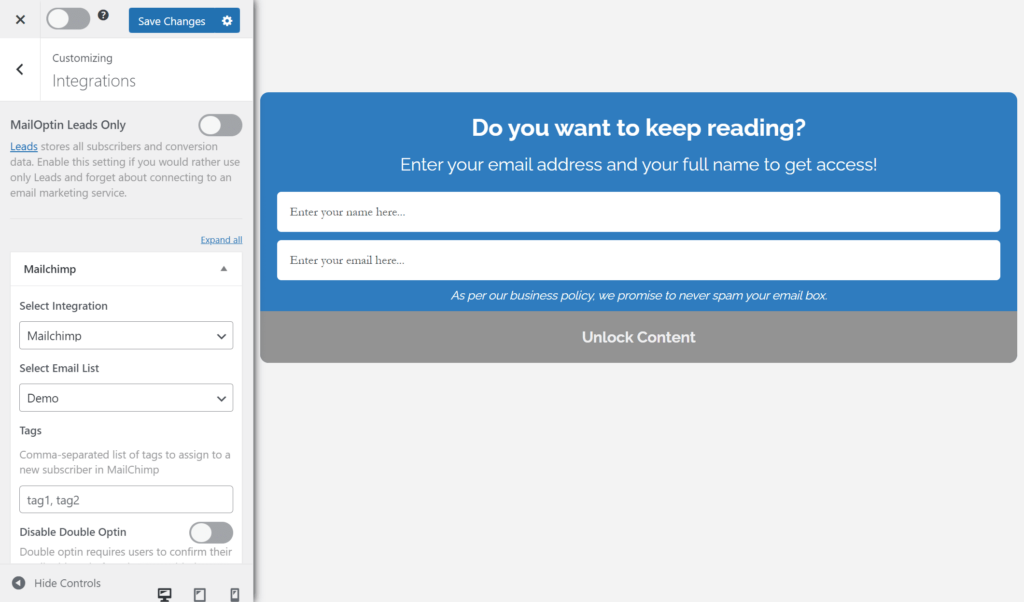
This ensures that the information collected from your opt-in form is synced to your Mailchimp account.
Activate Your WordPress Content Locker
To enable the content lock feature, open the ‘Configuration’ panel and toggle on the ‘Lock Content Below Optin’ switch.
Next, choose the style of content lock you want:
Obfuscation: This option will blur the content.
Removal: This option will completely remove the content.
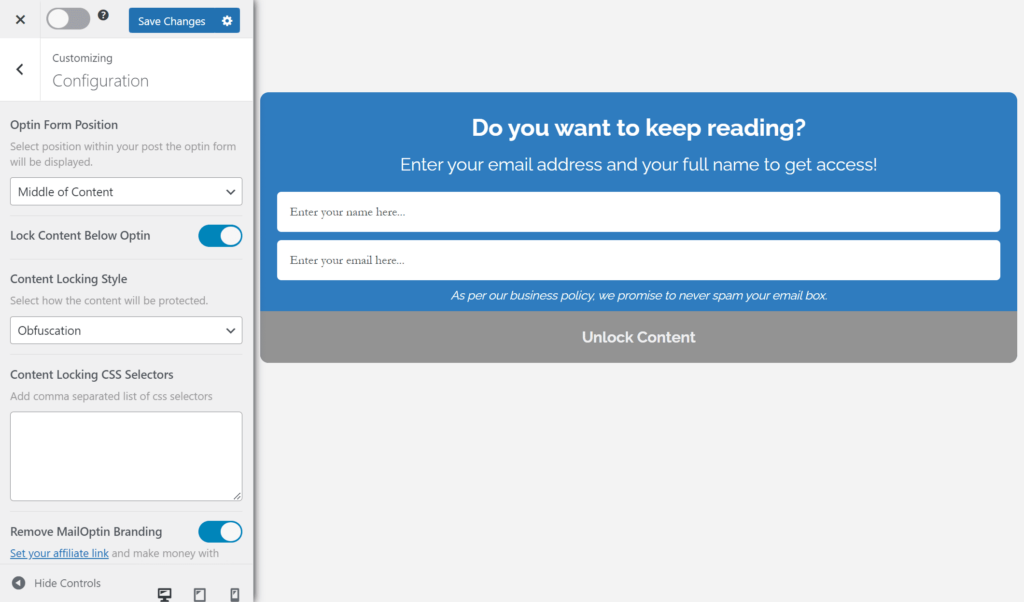
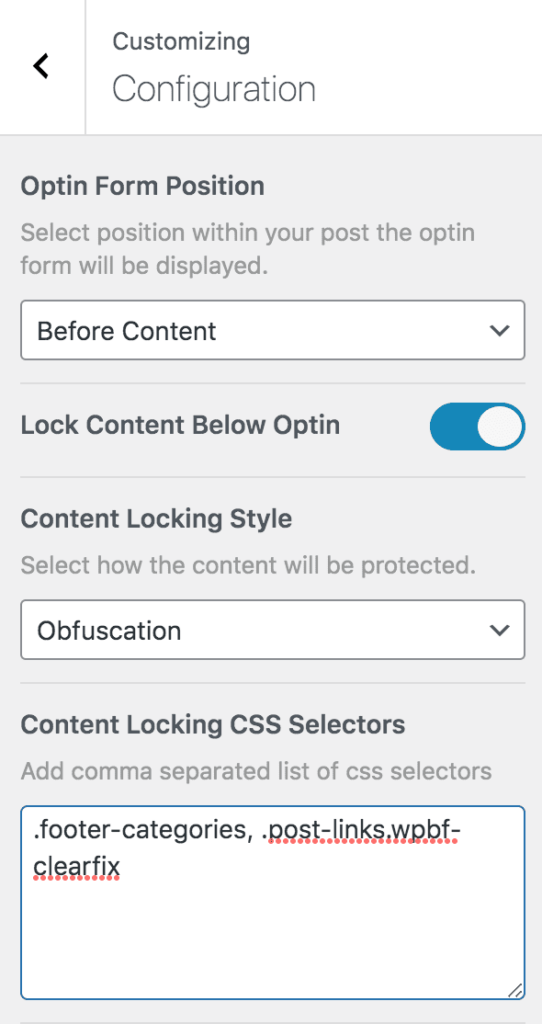
You can also specify CSS selectors of additional content to obfuscate or remove.
After completing the necessary adjustments, click the “Save Changes” button and activate the opt-in form by checking the box beside the “Save Changes” button.
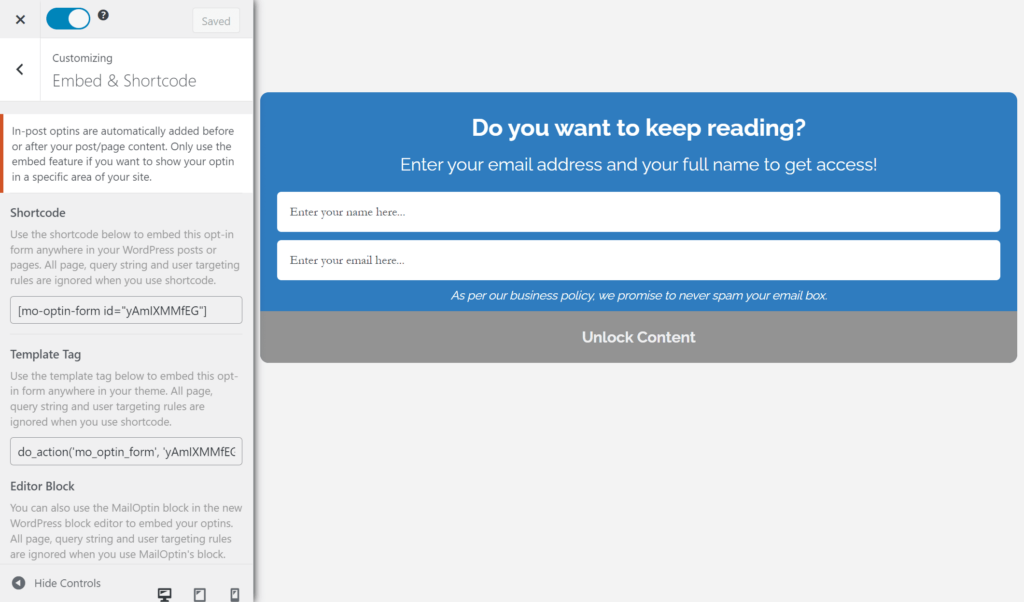
Before exiting the form customization page, go to the Embed & Shortcode panel and copy the optin form shortcode. Additionally, deactivate the ‘Show Optin Globally’ checkbox under the Display Rules > Page Targeting menu.
Next, go to the page or post where you intend to add a content locker and paste the shortcode precisely where you want the content locker to appear.
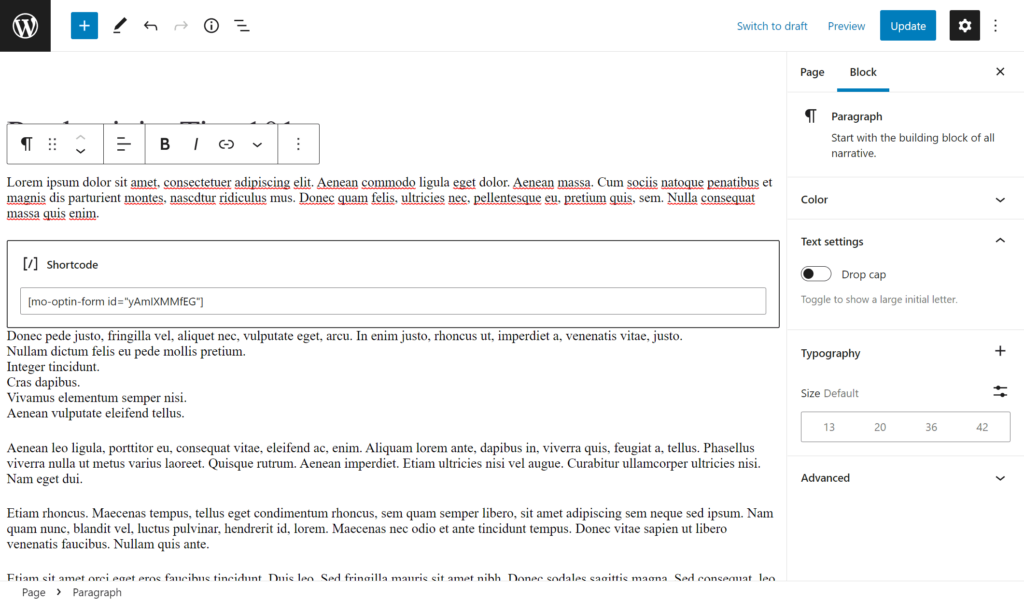
Be sure to click on the Update button to continue.
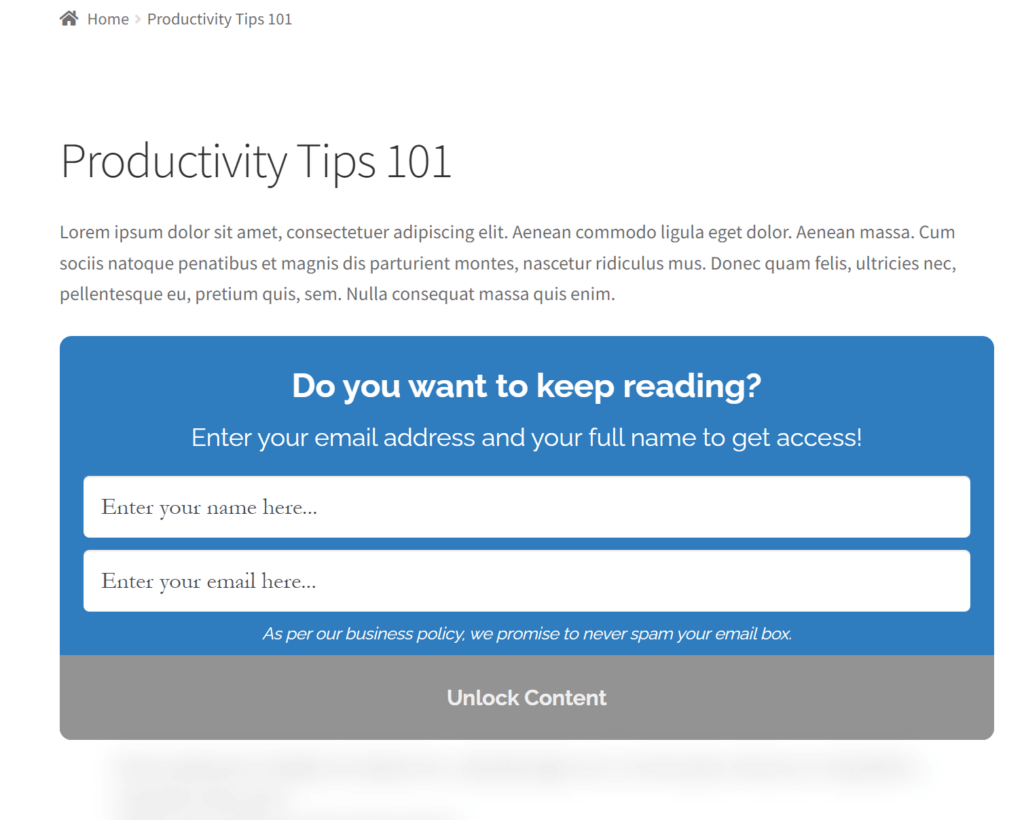
As you can see from the sample page above, the content has been locked precisely from where we inserted the shortcode. Therefore, site visitors must enter their email addresses and names before gaining full access to the premium content on the WordPress site.
Final Thoughts on Creating a Paywall in WordPress
This guide explores creating a paywall in WordPress, which offers a pathway to effectively monetizing your valuable content.
We have thoroughly examined what a paywall is and provided a detailed guide on how to set up a paywall using the ProfilePress Plugin.
We have also introduced an alternative method, the MailOptin content-locking feature. This new option expands your choices, allowing you to customize your approach to meet the unique requirements of your WordPress site.
When trying to make your content valuable and profitable, this guide offers insights and tools to help you choose between ProfilePress and MailOptin, depending on what is most suitable for your audience.